1. Summary
Obsidian's built-in checklist function is simple and easy to use, and its main points are as follows:
- Check items start with
- [ ]. - There must be one character between
[and]. - If this character is space, it means that the check item is unfinished, such as
- [ ] Bathing. - If this character is a character other than a space, it means that the check item has been completed, such as
- [x] Playing.
How to use the Obsidian Checklist feature is shown in the video below.
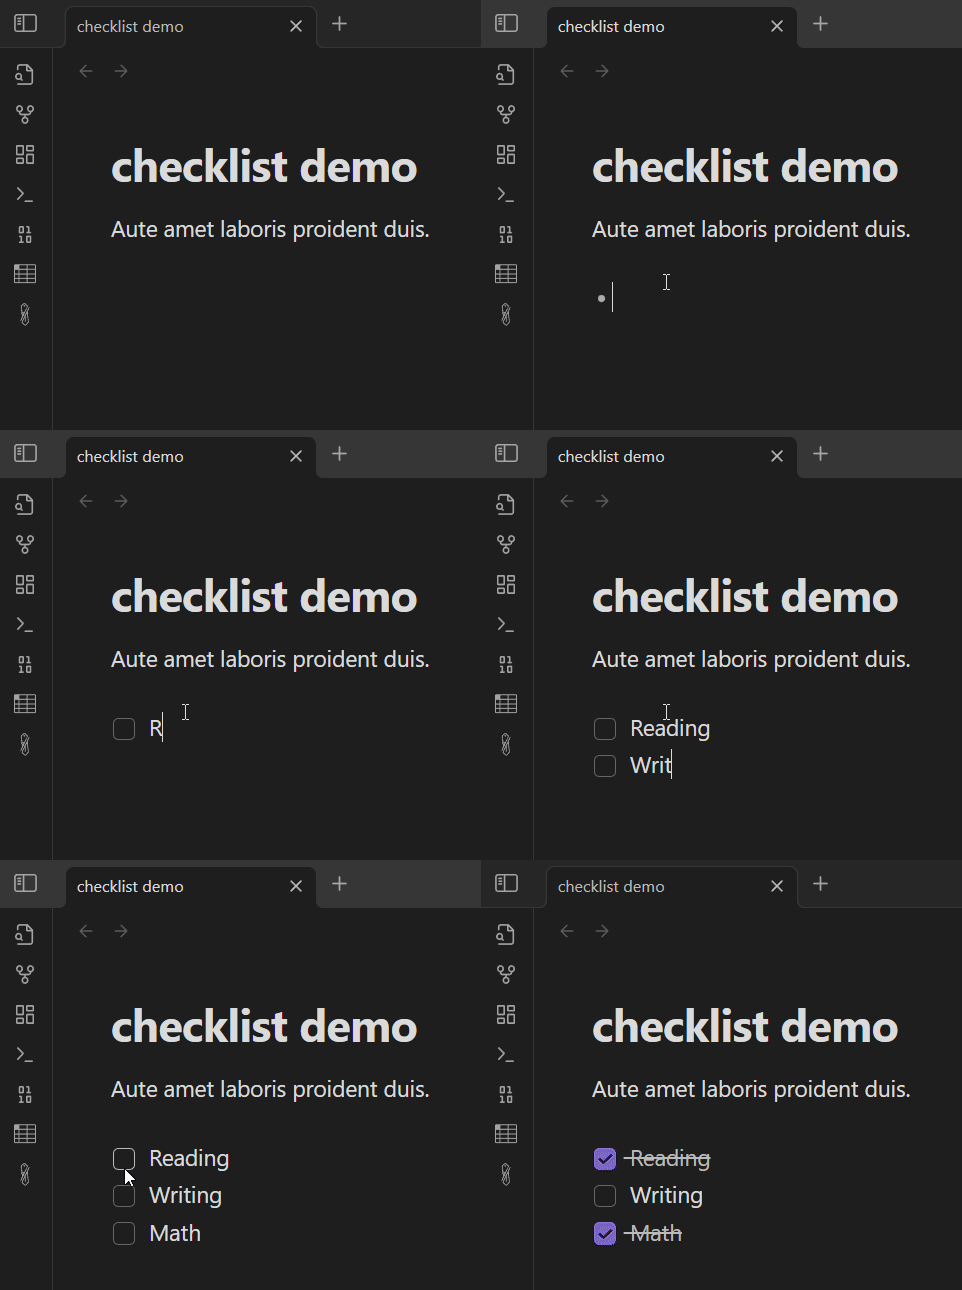
During use, you will find that there are two problems with the Obsidian checklist function:
- Problem 1: If you have a lot of notes, you may forget which note contains the checklist, or which note the checklist is in.
- Problem 2: If multiple notes have checklists, you cannot see all checklists at once.
Obsidian Checklist Plugin (Checklist) was born to solve the above problems.
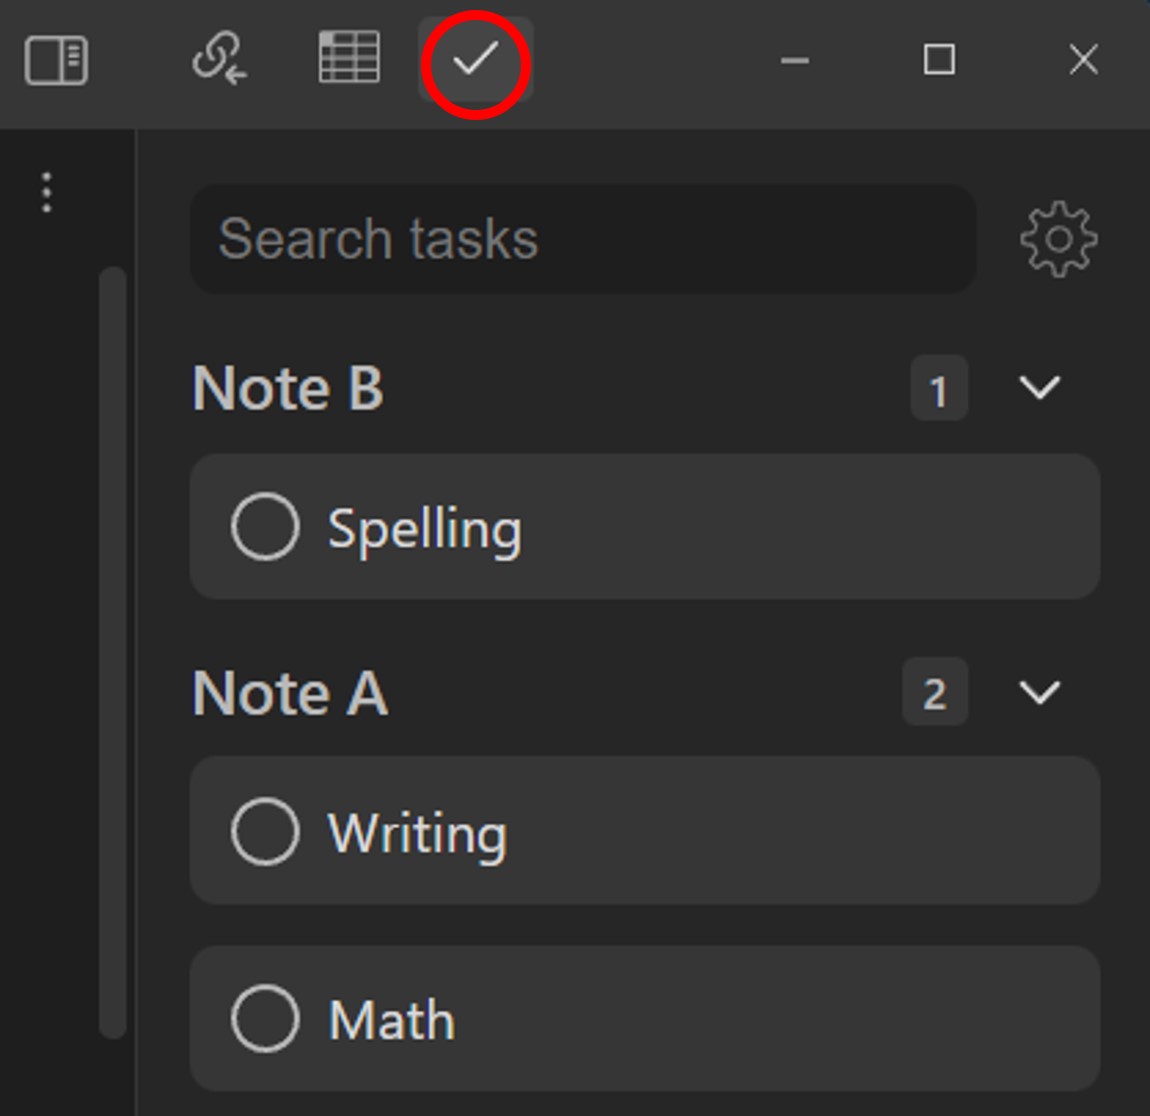
The effect of the Checklist plugin is shown in the figure below. The right sidebar will display the checklists in all notes, clearly.
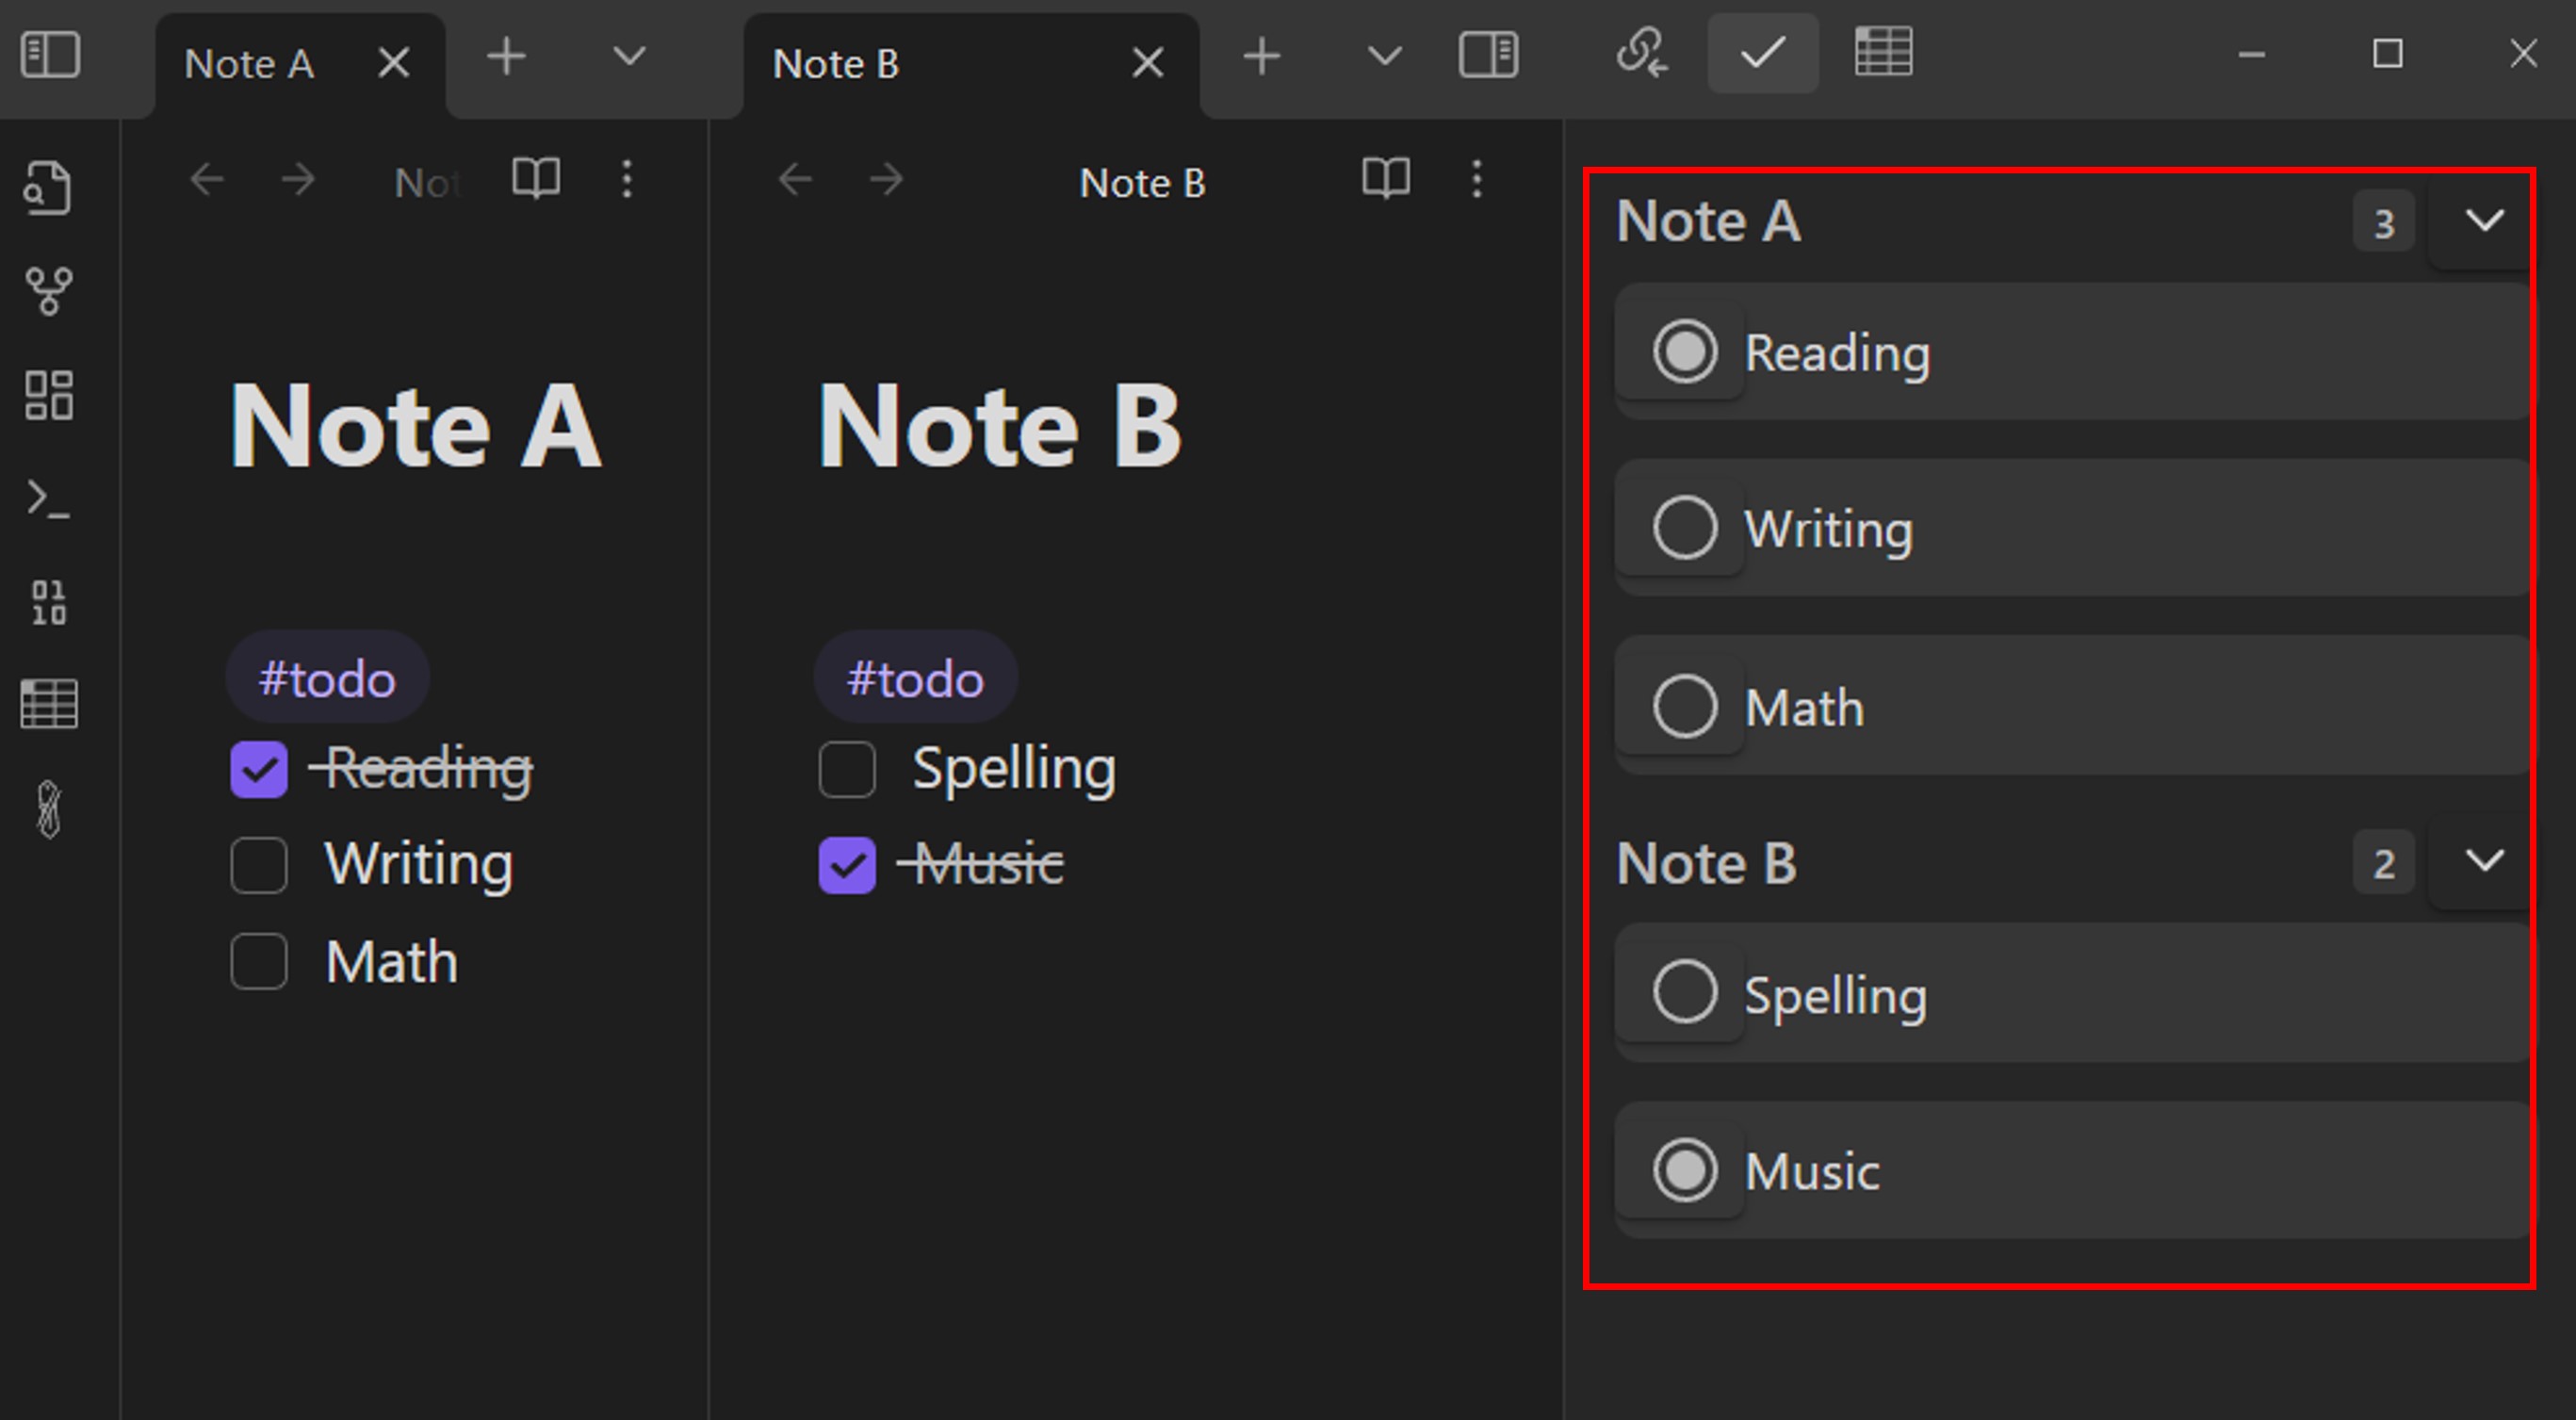
The plugin is open source and the code is hosted on Github at: https://github.com/delashum/obsidian-checklist-plugin/.
Next we introduce the installation and use of this plugin.
2. Checklist plugin installation
There are two ways to install the Checklist plugin: online installation and offline installation.
2.1 Online installation
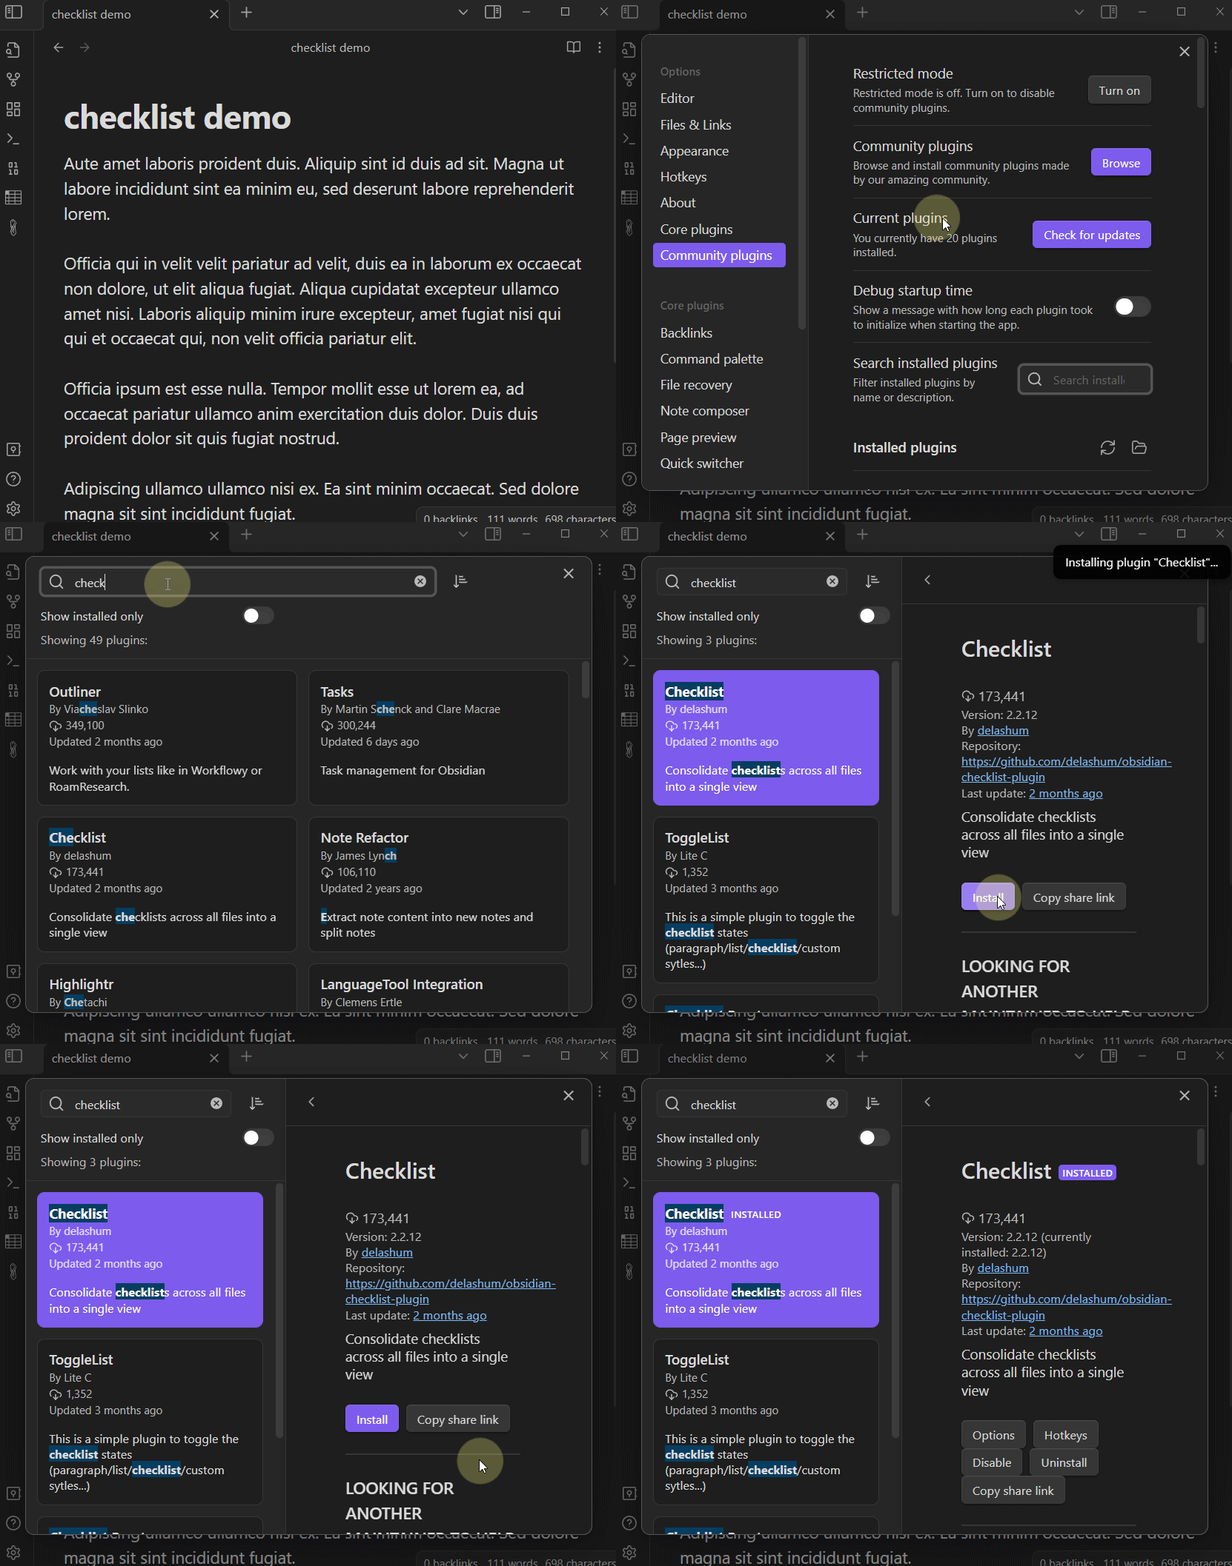
The Checklist plugin is a community plugin of Obsidian, online installation steps are as follows:
- Open Obsidian
- Click on Settings > Community plugins
- Click the Brwose button behind Community plugins
- Search checklist
- Click on the searched checklist plugin
- Click the Install button
- Click the Enable button
The online installation video is shown below.
2.2 Offline installation
Non-networked environments can use the offline installation method to install the Checklist plug-in.
The installation steps are as follows:
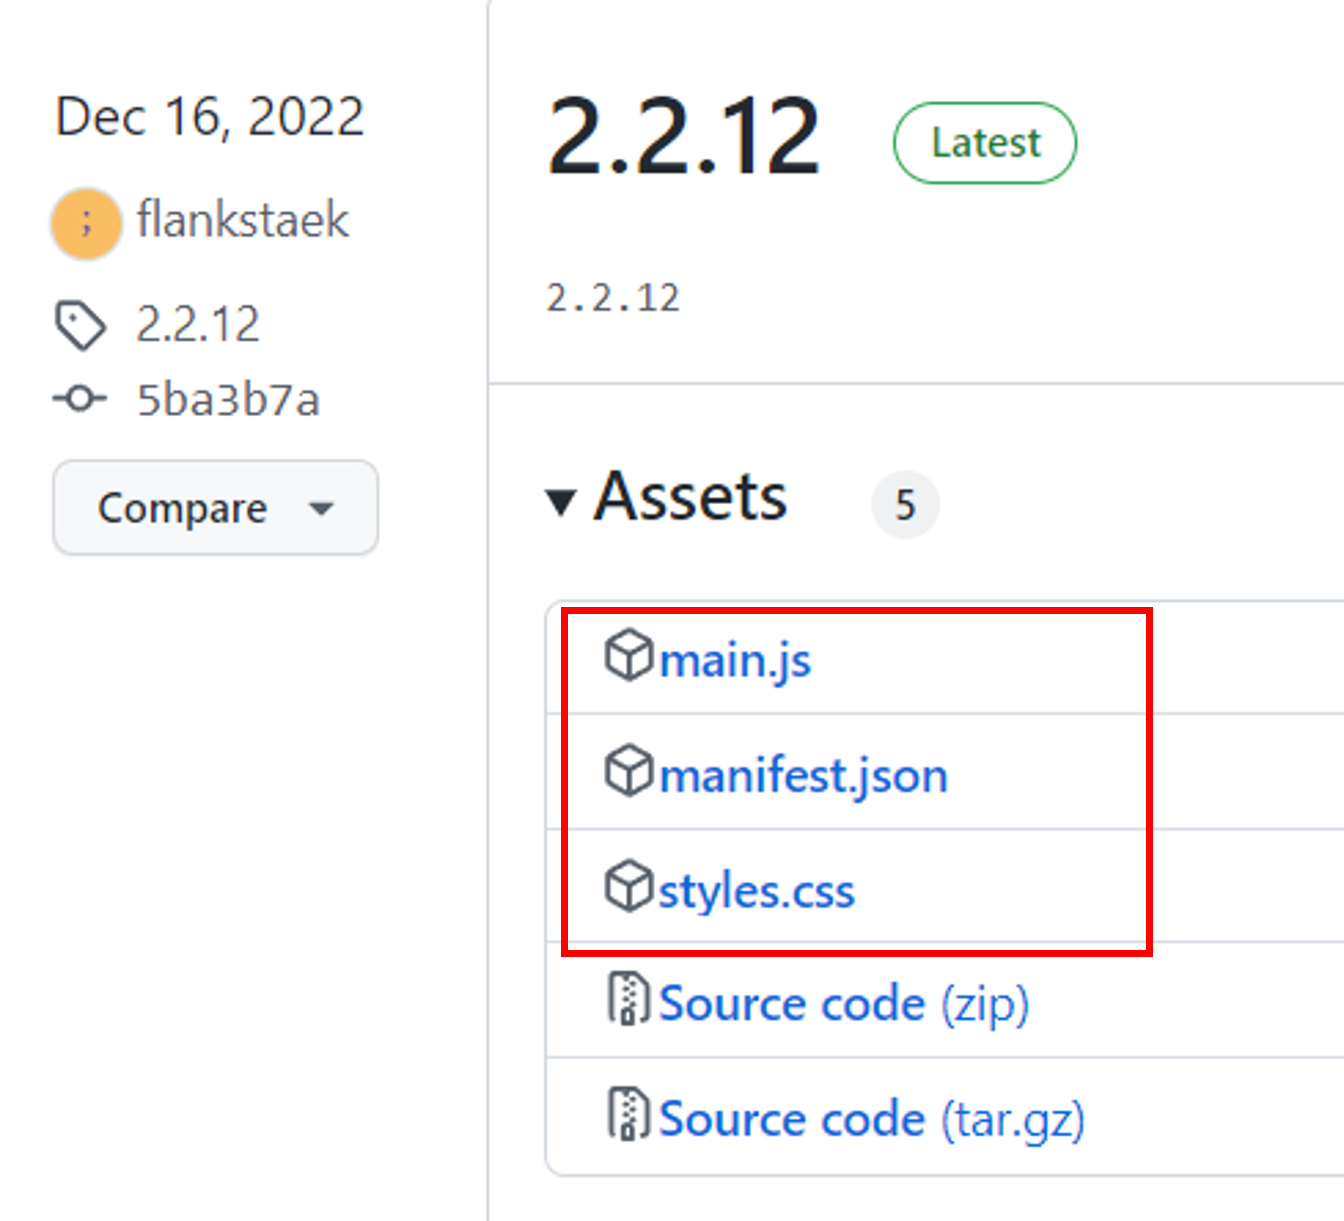
- Access https://github.com/delashum/obsidian-checklist-plugin/releases through a networked computer, and then download the three files in the red box, as shown in the figure below.
- On the offline computer, create a checklist folder in the .obsidian/plugins directory of your Obsidian library (create a plugins directory if it does not exist).
- Copy the downloaded three files to the newly created checklist folder.
3. How to use the Checklist plugin
After the Checklist plugin is activated, there will be an additional button on the toolbar, as shown by the red circle in the figure below.
The Checklist plugin has two display modes:
- Display all checklists.
- Display the checklist under the specified tag. After installation, the default tag is
todo.
For example, in the example below, items 1, 2, and 3 will appear in the checklist list, while items 4 and 5 will not appear in the checklist list.
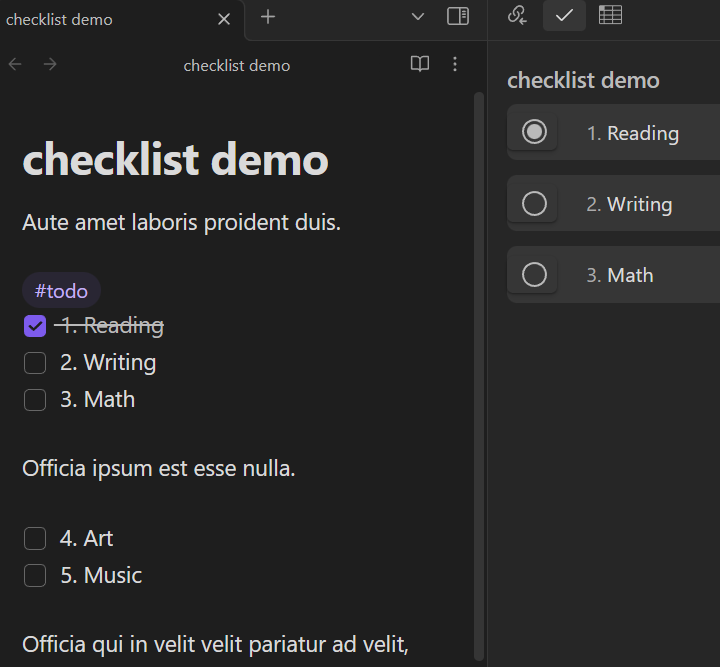
The Checklist plugin can display only unfinished check items, or it can display all status (unfinished, completed) check items. After installation, only unfinished check items are displayed by default.
The above are determined by Checklist plugin options, the steps to configure Checklist plugin options are as follows.
- Click the Settings button on the left toolbar (the icon is a gear).
- In the pop-up setting window, slide down the scroll bar on the left, find the Checklist plug-in under the plug-in option group, click it, and the setting interface of the plug-in is displayed on the right side of the scroll bar, as shown in the figure below.
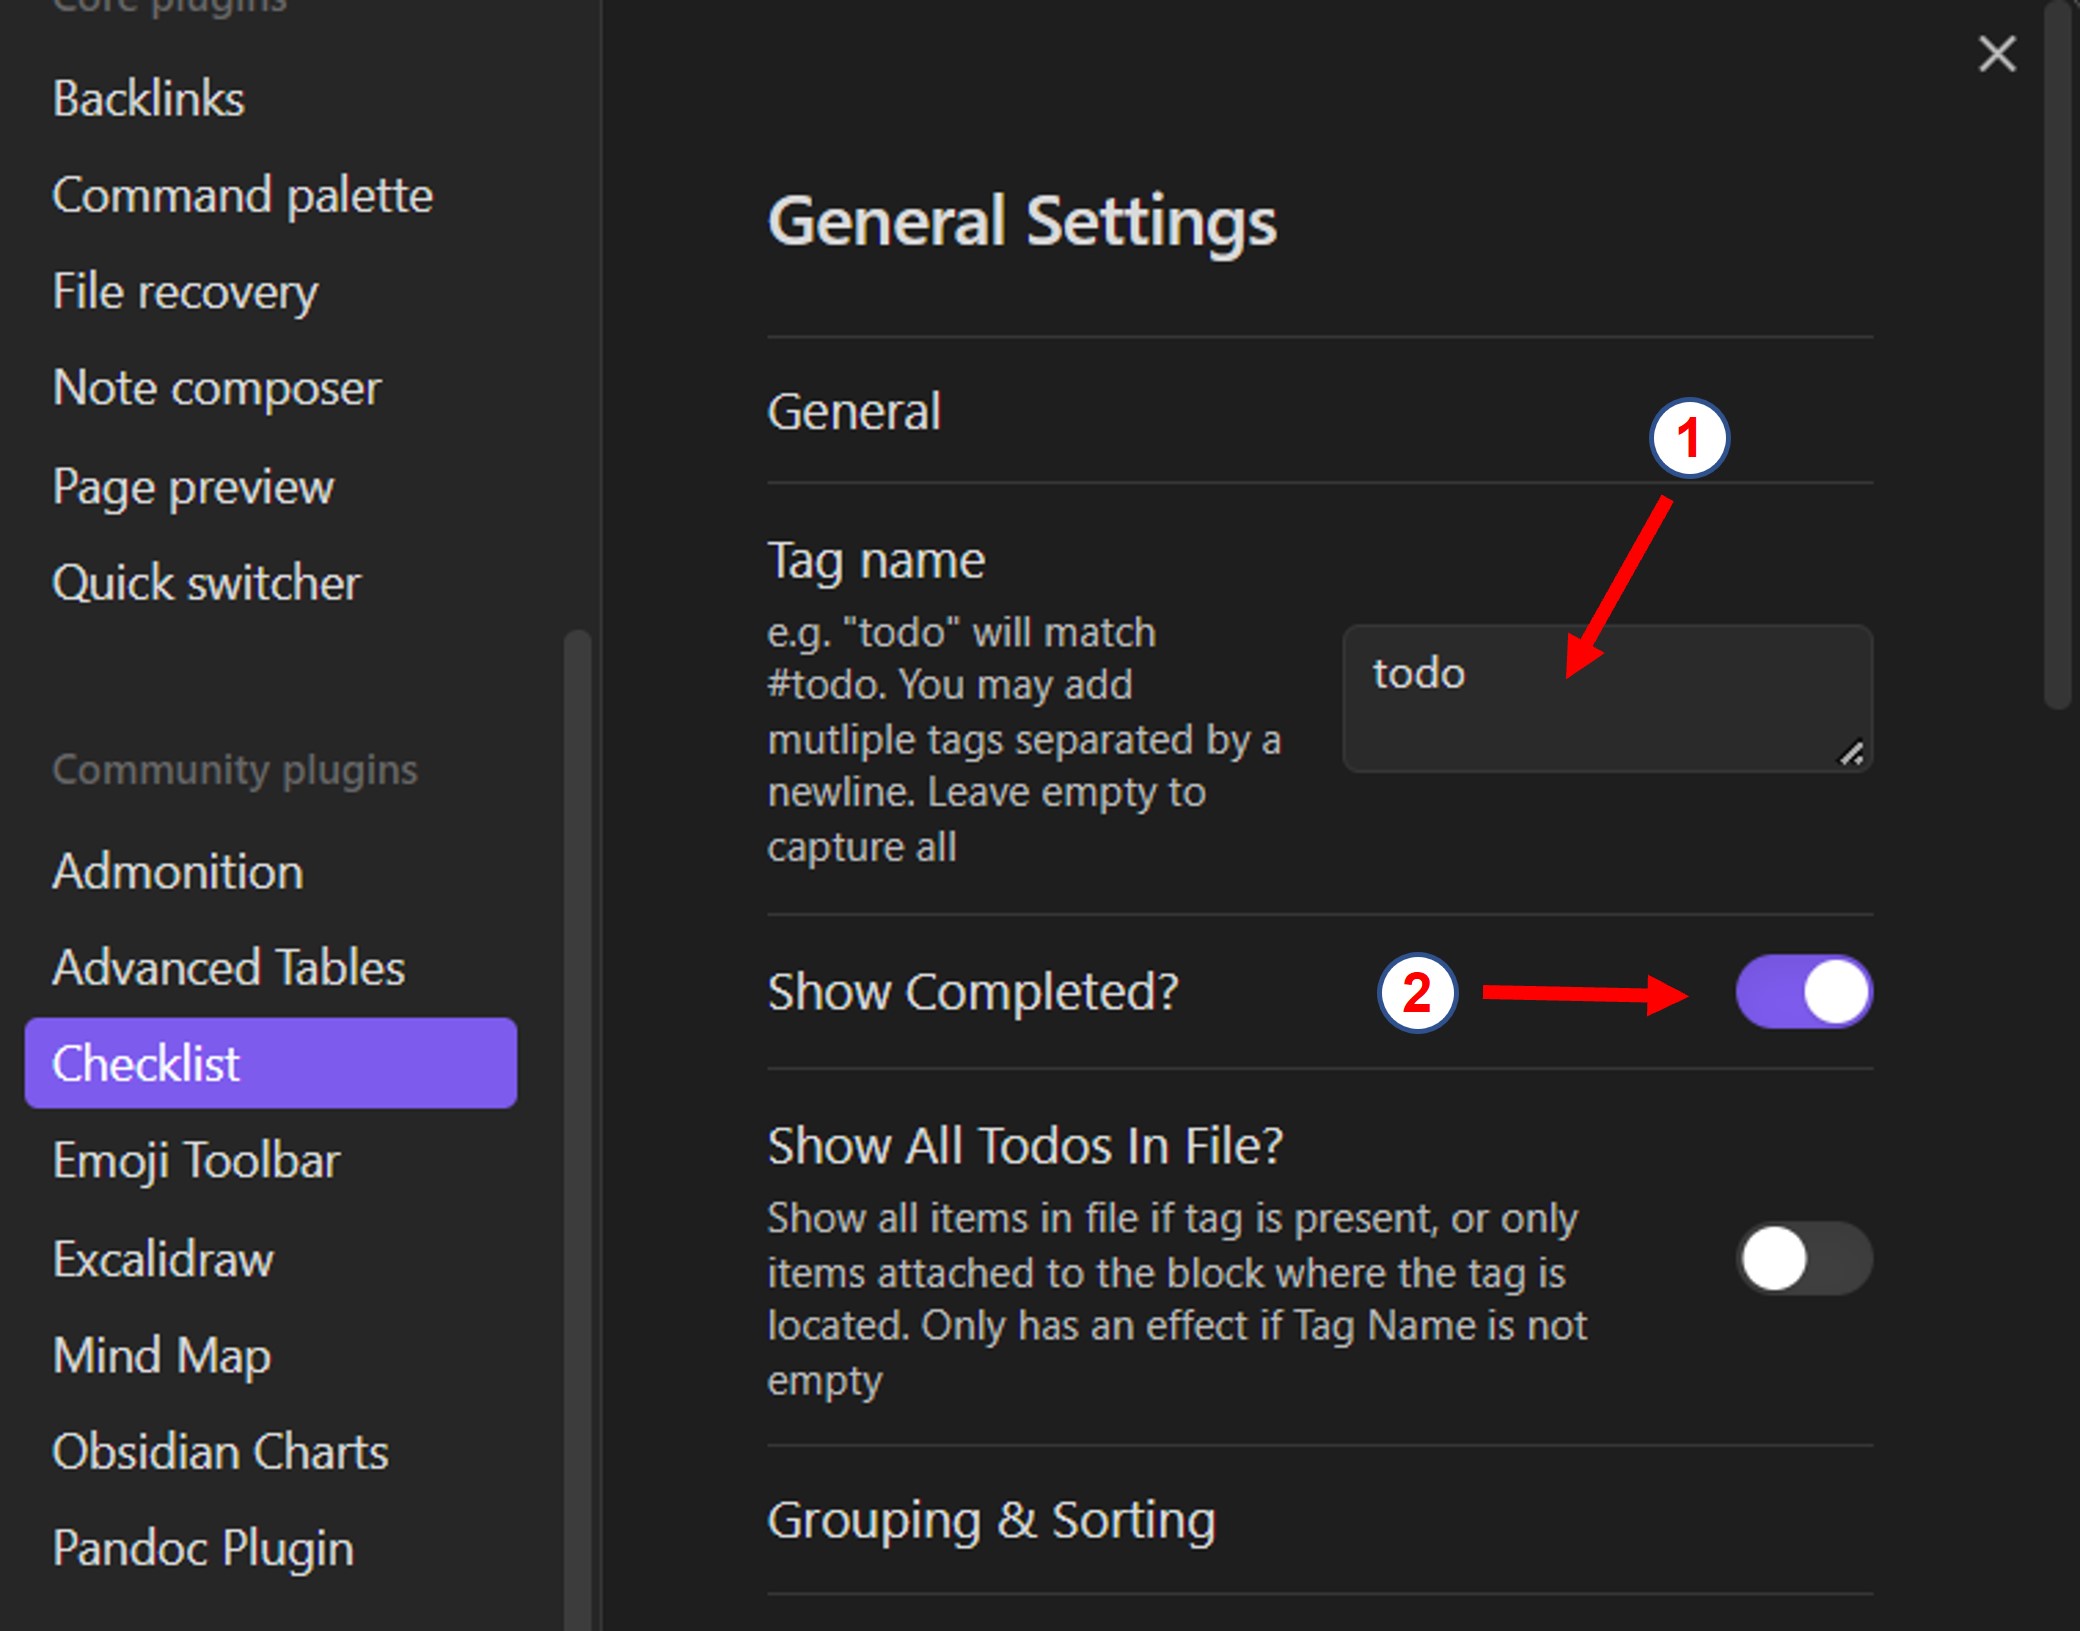
- The red 1 in the above picture is the place to set the label. If the edit box is cleared, all check items will be displayed, otherwise all check items under this label in all notes will be displayed.
- The red 2 in the above picture is to control whether to display the completed check items.
I won’t introduce other setting items, you can explore slowly.